
Important Calendar Settings
Creating a new event
This is actually really easy. Let’s start in the WordPress dashboard — you should be able to find a menu entry called Events and, if you click on it, you should see the Add New link.
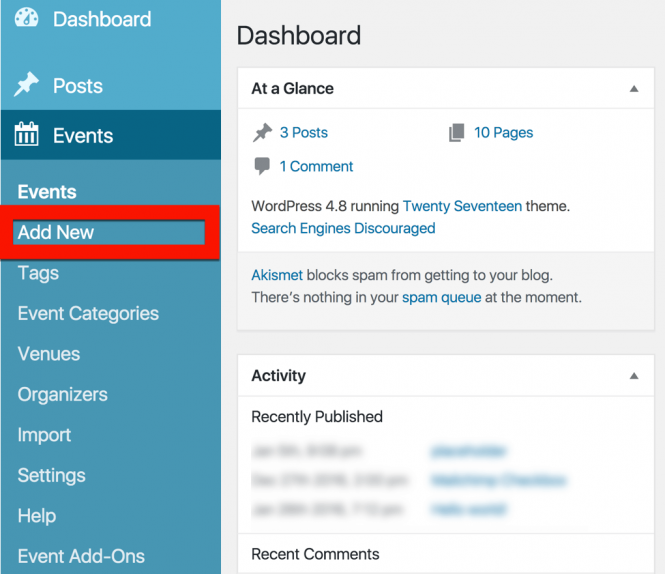
Once you’ve found it, go ahead and click on it! This should bring you to the event editor.
The event editor hopefully won’t contain too many surprises: it is intentionally almost identical — at least on first glance — to the regular page and post editor used by WordPress itself.
So, if you’re familiar with WordPress, you should feel right at home. Here is how to create an event in the classic editor:
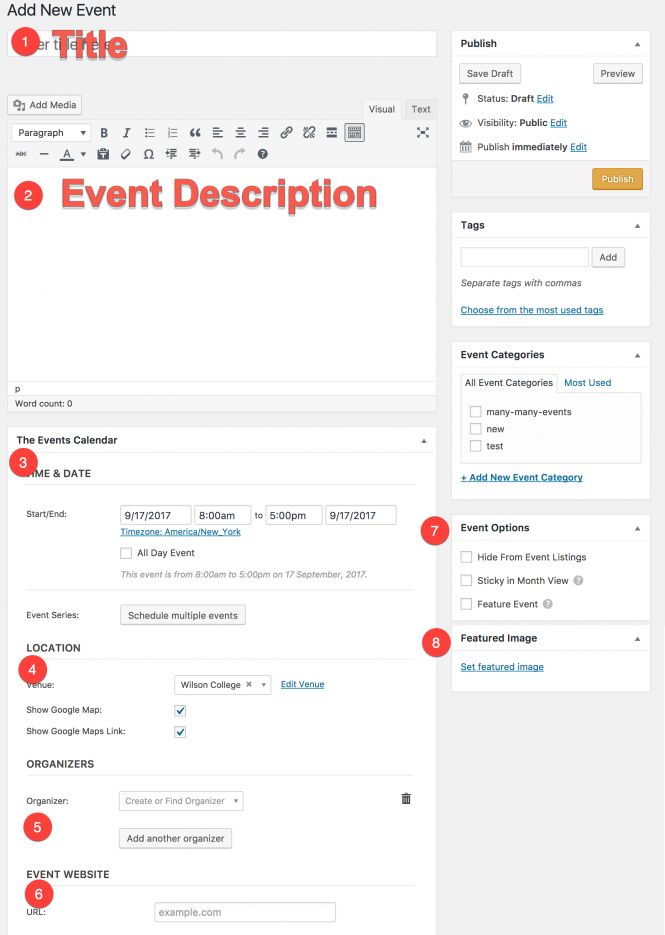
- Add a title to your event
- Describe your event
- Select the date and time for your initial event (required), as well as any desired recurrences (optional)
- Select an existing venue or create your own (optional)
- Specify the event organizer (optional)
- Link to an external website about the event (optional)
- Determine if the event should be featured (optional)
- Upload a featured image to display in event listings (optional)
If you are using Block Editor, the default layout will look slightly different:
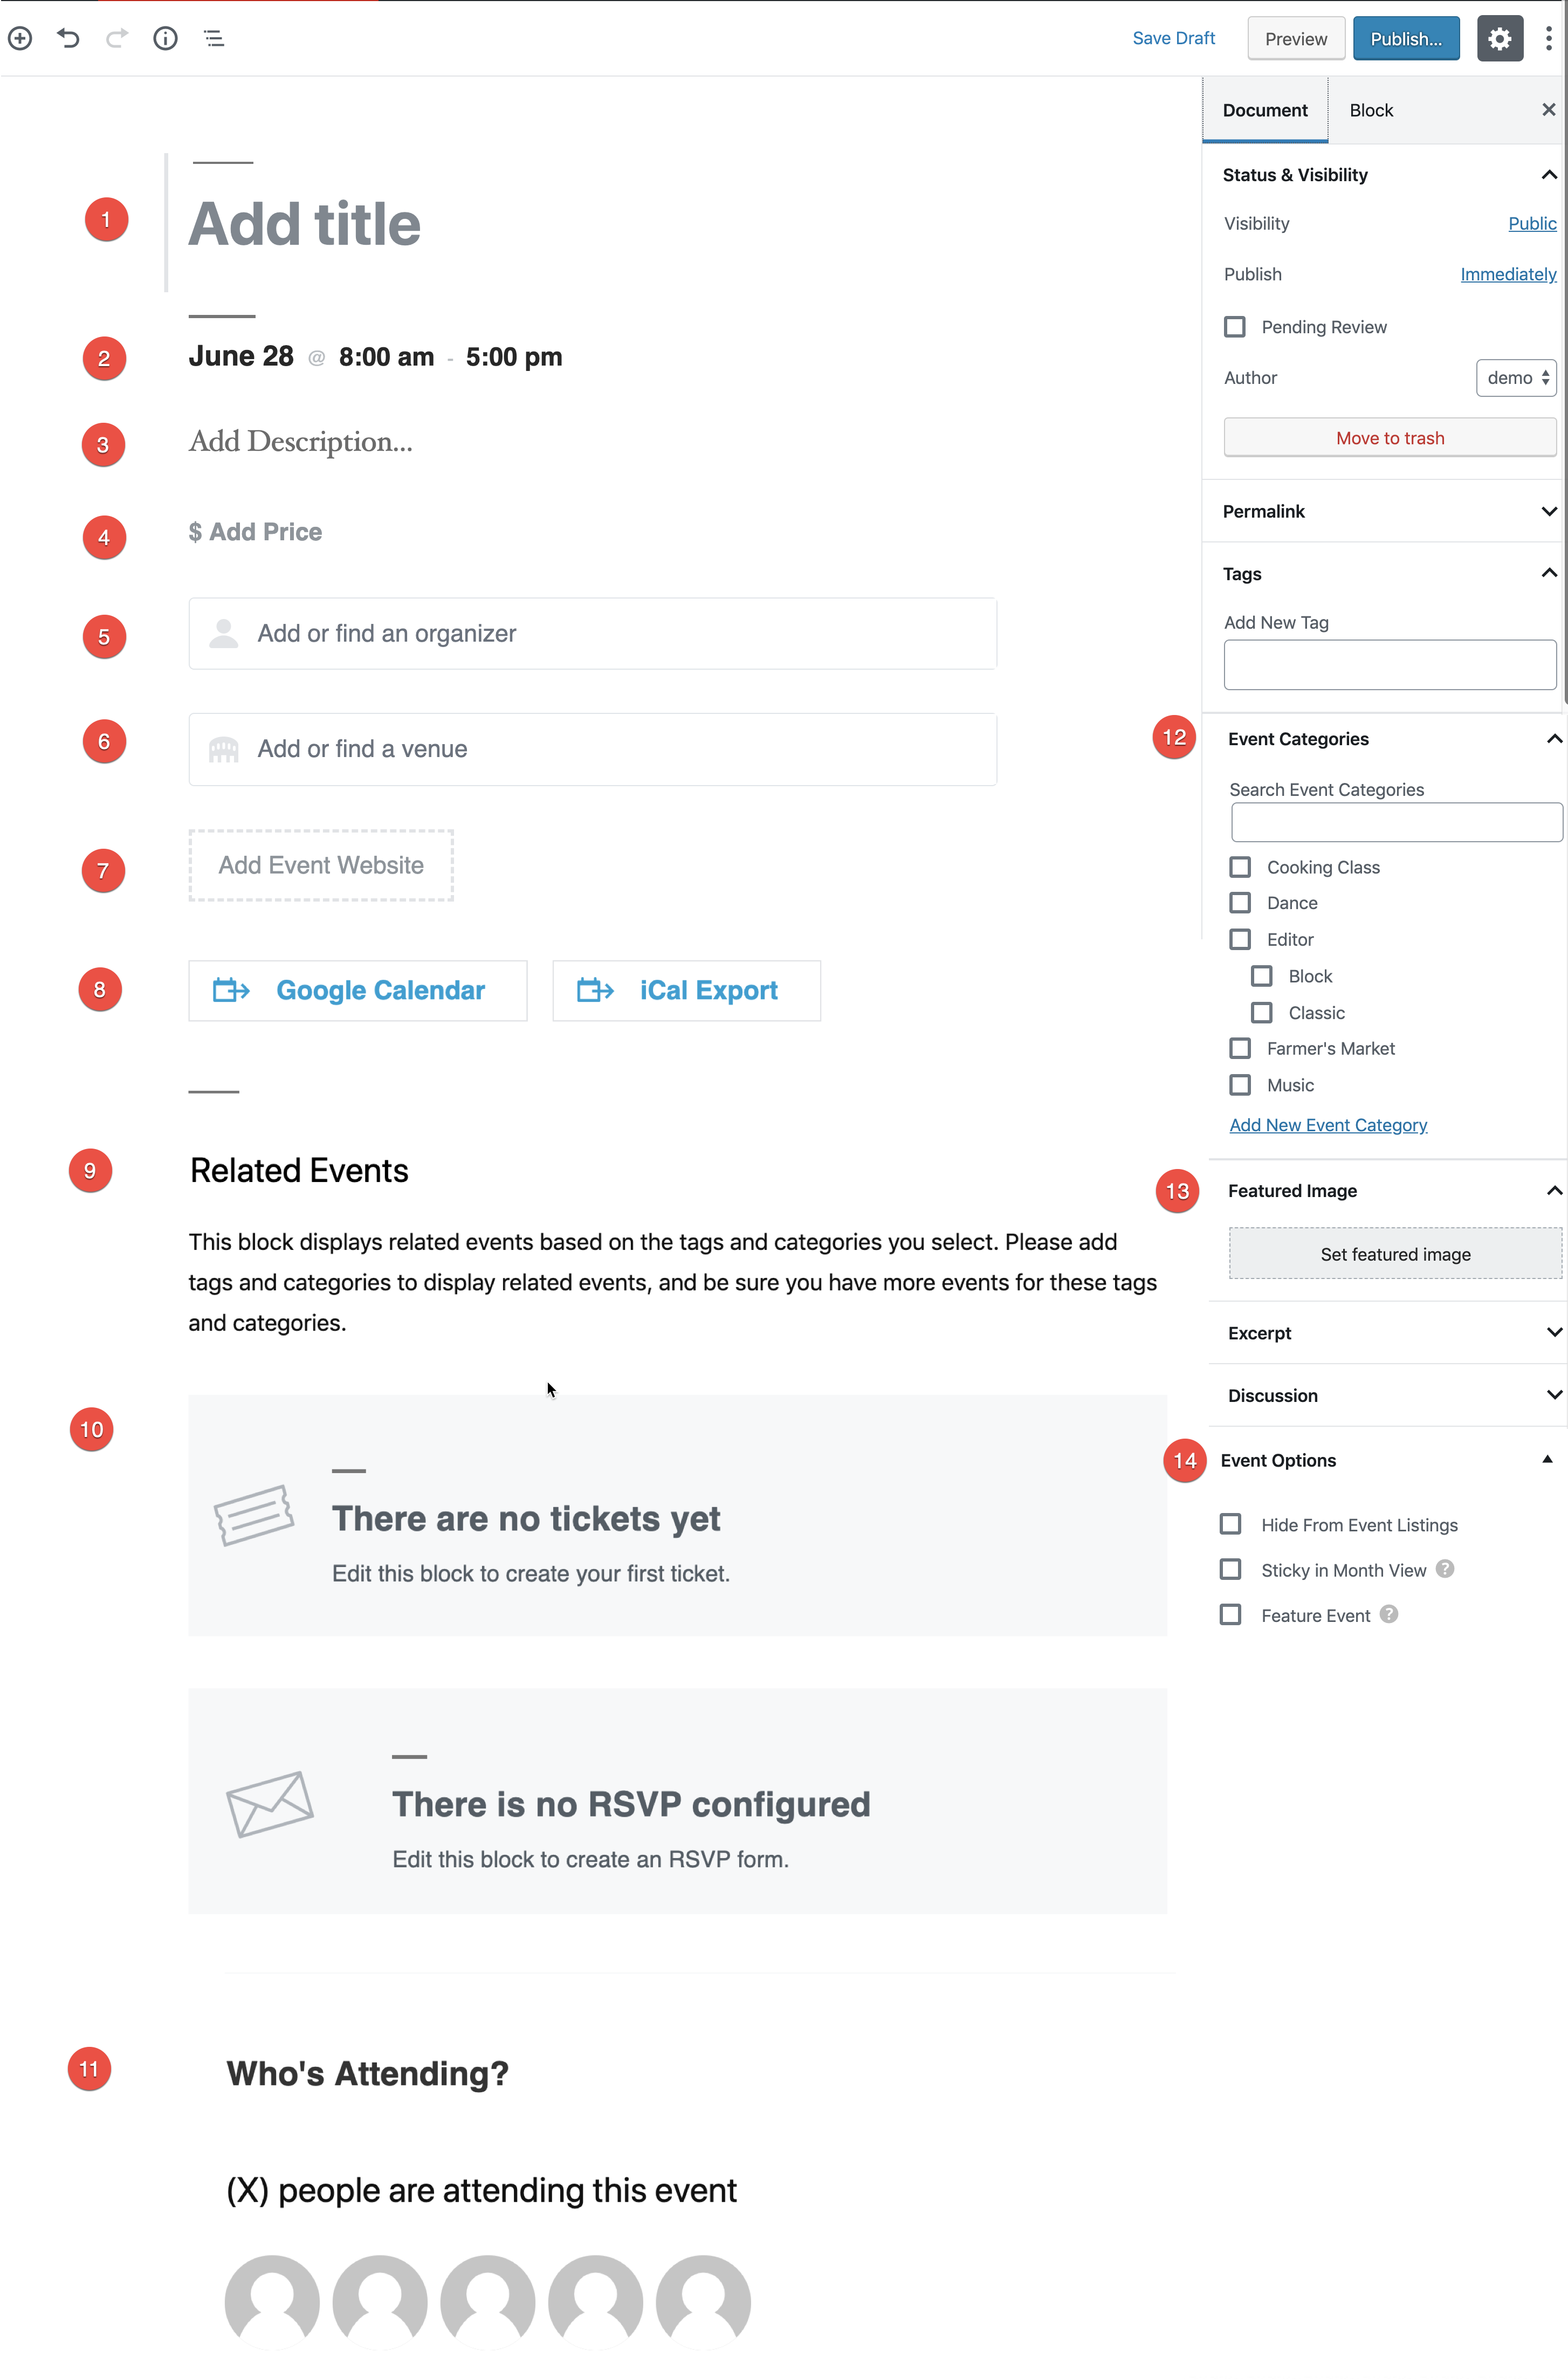
- Add a title to your event
- Select the date and time for your initial event (required), as well as any desired recurrences (optional)
- Describe your event
- Add a price for your event (optional)
- Specify the event organizer (optional)
- Select an existing venue or create your own (optional)
- Link to an external website about the event (optional)
- Provide visitors with a way to add this event to their own calendar software (optional)
- Show related events (optional)
- Display tickets/RSVPs if using Event Tickets and Event Tickets Plus (optional)
- Show who is attending the event if using Event Tickets Plus (optional)
- Select an Event Category (optional)
- Upload a featured image to display in event listings (optional)
- Determine if the event should be featured (optional)
For more help creating events, please see Creating an Event.
Creating a recurring event
? Note: This is a feature limited to Events Calendar Pro
In the Time & Date settings of your event, you will find the Event Series settings, which are used to turn one event into a whole series of events. This is known as a recurring event.
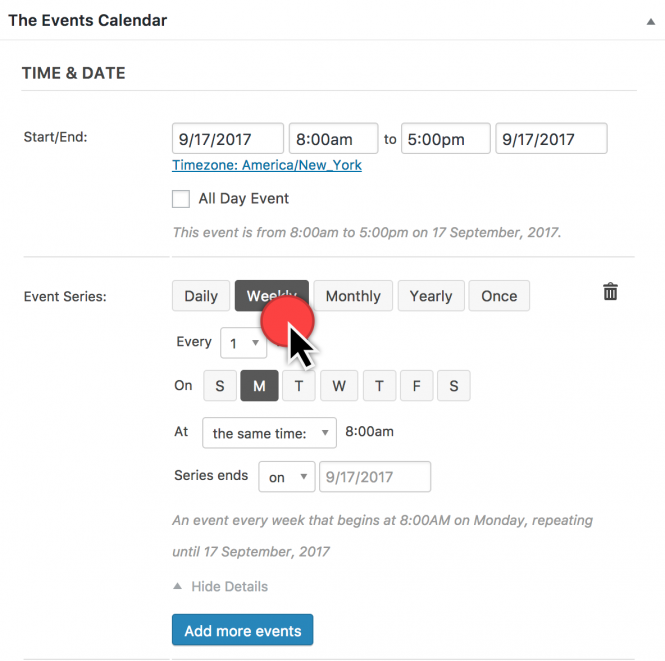
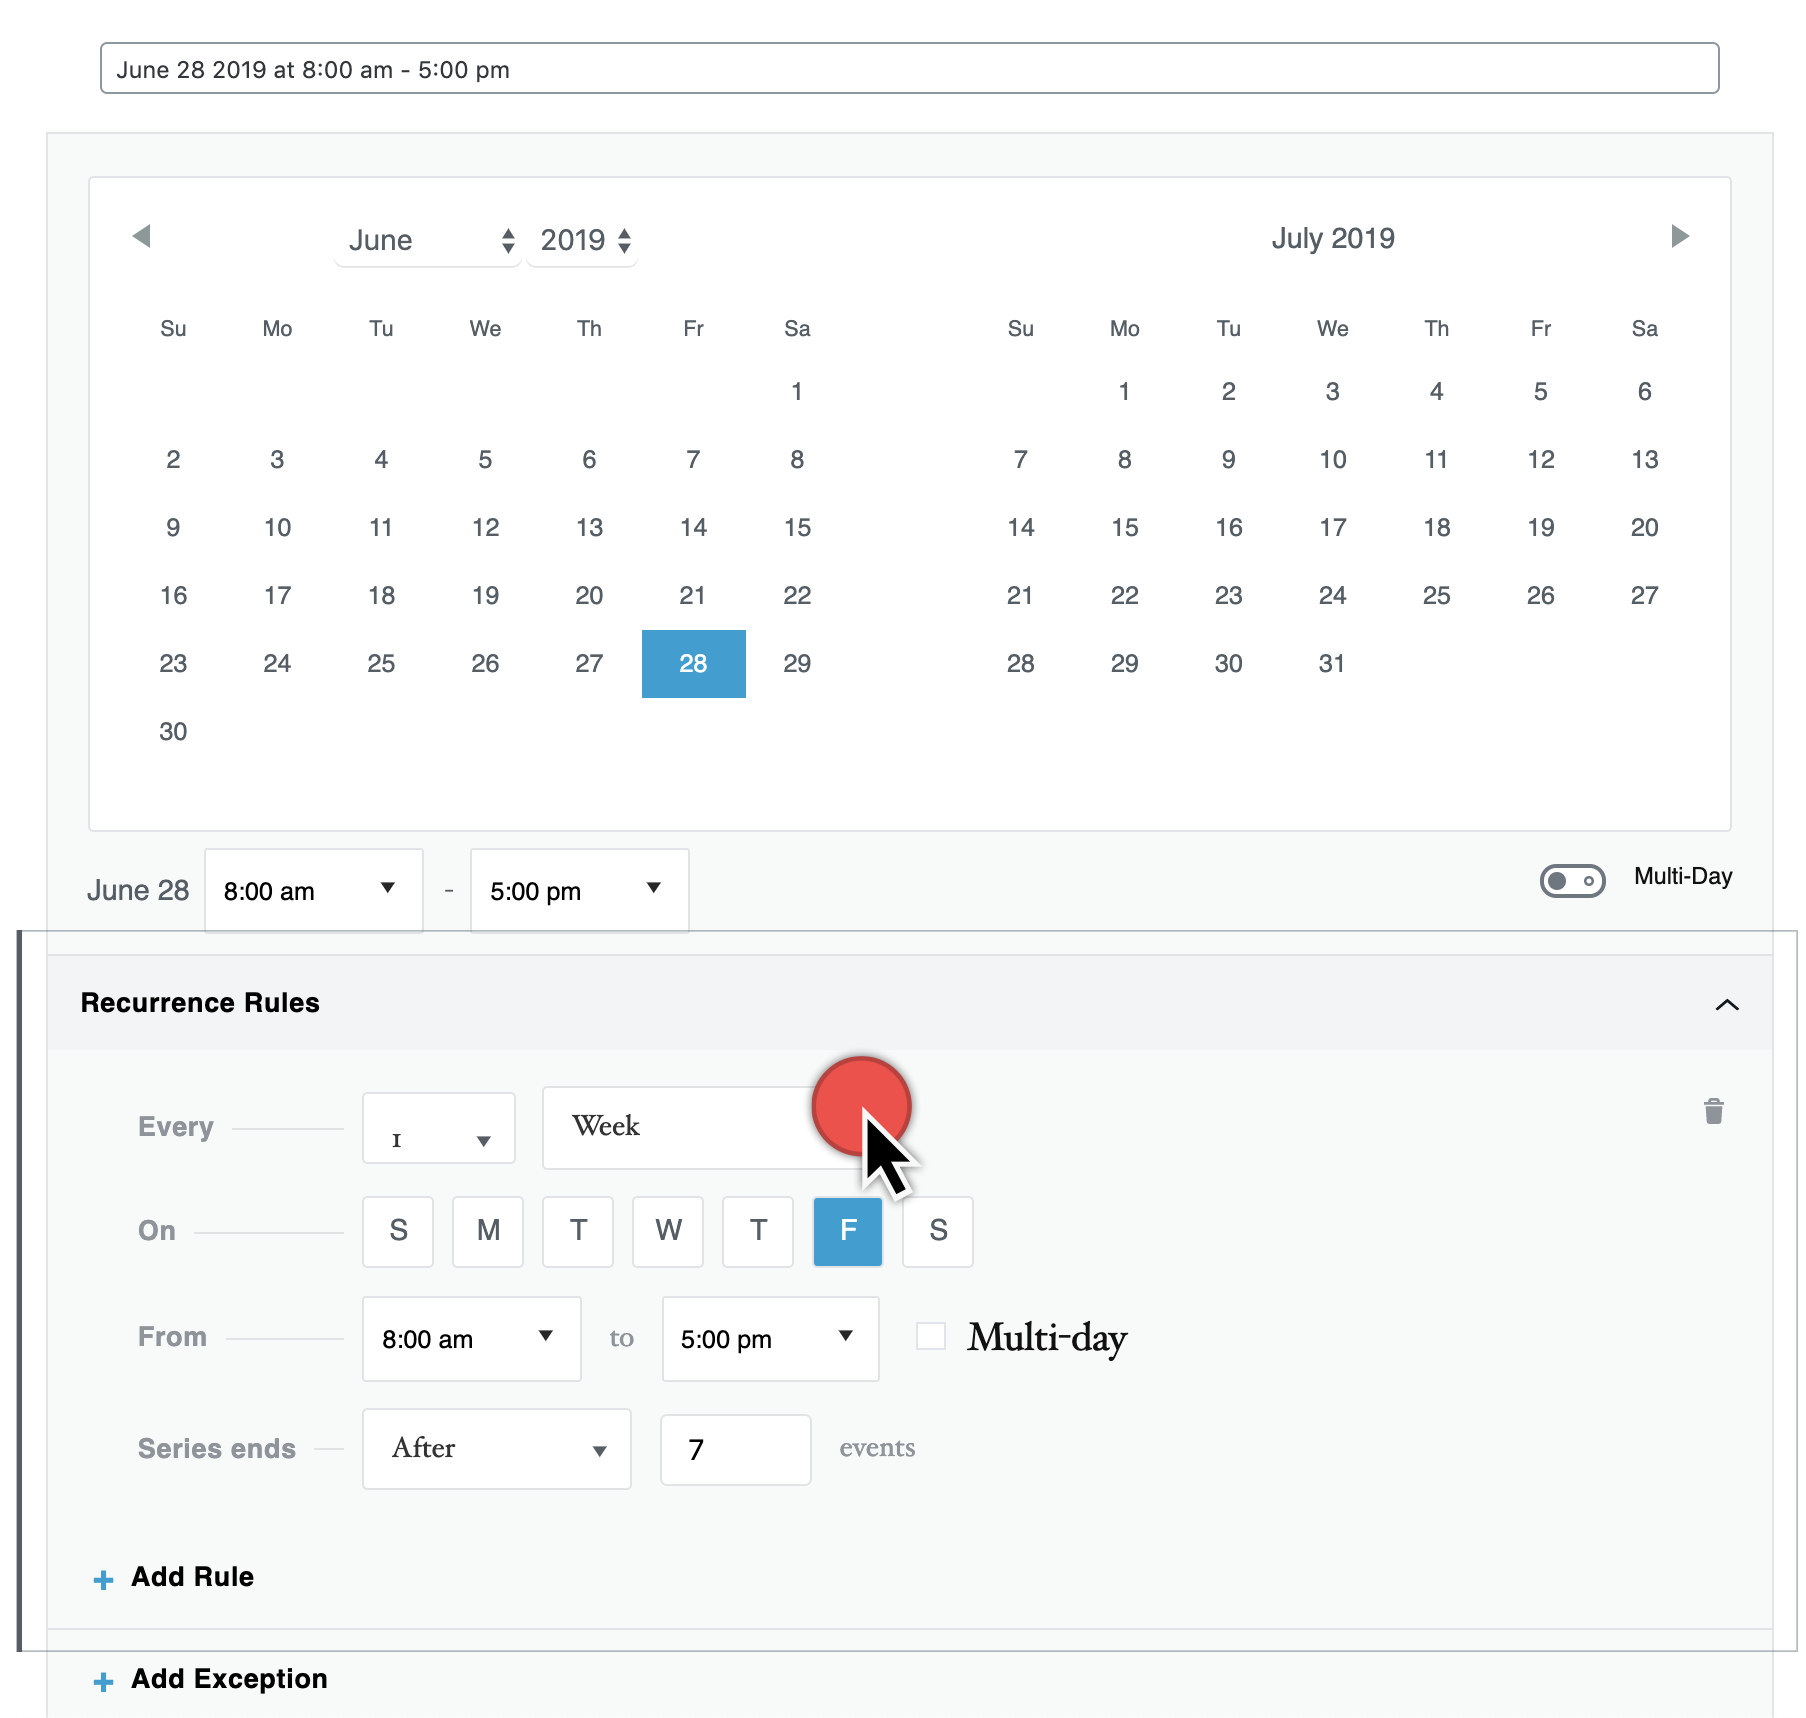

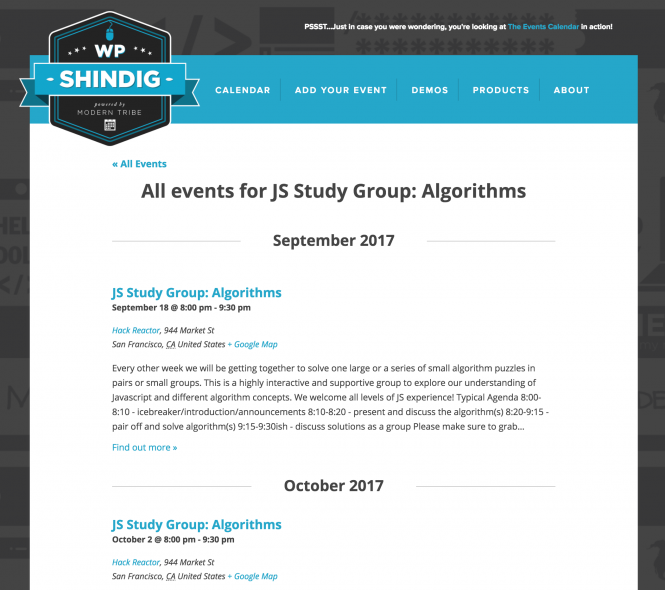
When you click on the “See All” recurring event link, you will see a list of all events within the series
Setting dates and times
The Events Calendar uses your WordPress settings to determine on what day the week begins along with other time-related settings. Go to Settings → General to modify these settings.
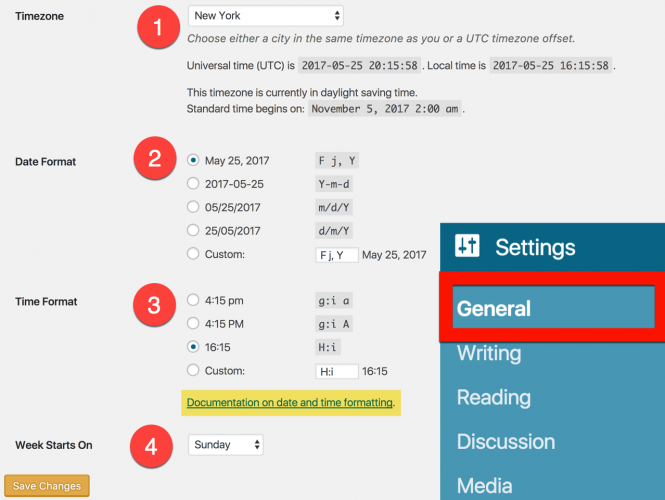
- Select your timezone (See “Working with Timezones” for more help on this)
- Select or customize the date format. (For additional customized formats, see the WordPress guide)
- Select your preferred Time Format (For additional customized formats, see the WordPress guide)
- Select which day the week starts on. By default, WordPress is set to start the week on Mondays
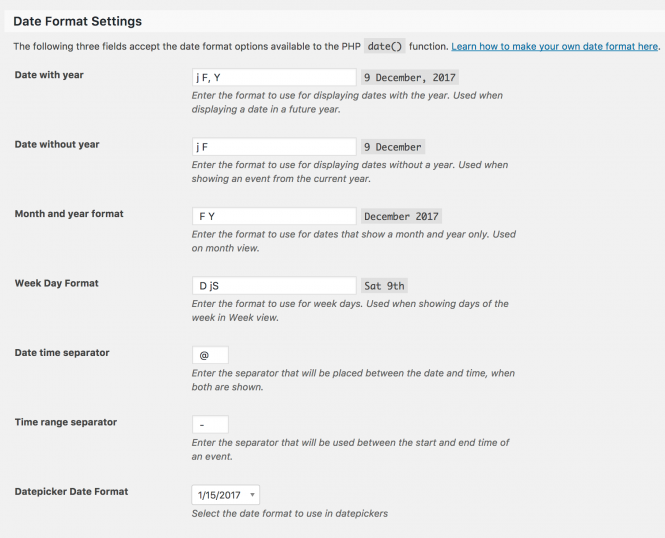
You can also modify the wording and order that the day of the week, date, and year are displayed by modifying settings in Events → Display.
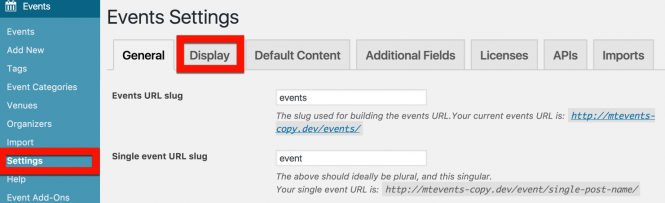
Changing your calendar address
By default, your calendar will be accessible at yoursite.com/events, where yoursite.com is the address for your site’s home page. If you want your calendar to appear on a page titled something other than /events, you can easily modify the link. Go to Events → Settings → Display.
Changing permalinks
We generally recommend using “pretty” permalinks with The Events Calendar. Without getting too technical, some of the functionality of the plugin depends on these more-readable URLs in order to work.
Go to Settings → Permalinks. Then select the style of permalink that you want. We recommend Post Name.
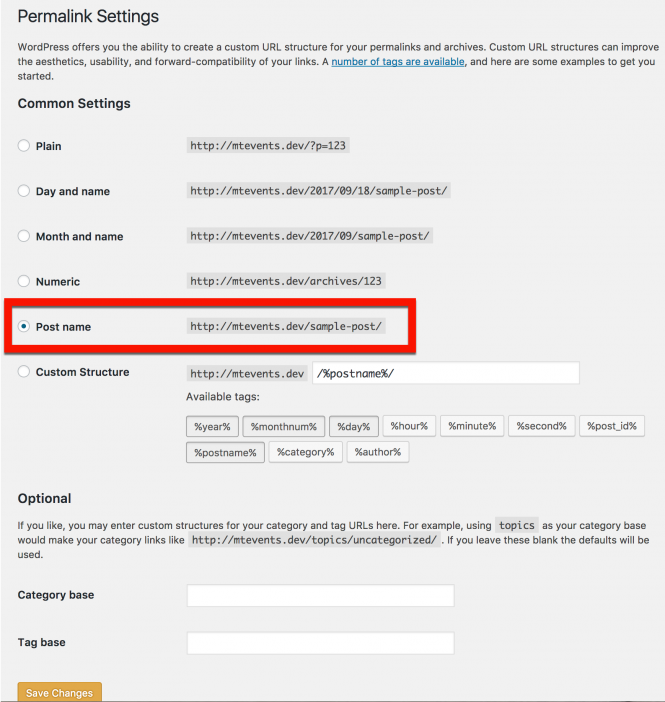
Learn more at Permalinks Best Practices.
Setting the calendar’s default view
To modify the layout of your events page, you can select from several view options. Go to Events → Settings → Display.
? The Events Calendar offers List, Month, and Day views. Events Calendar Pro adds Week, Map, and Photo view options.
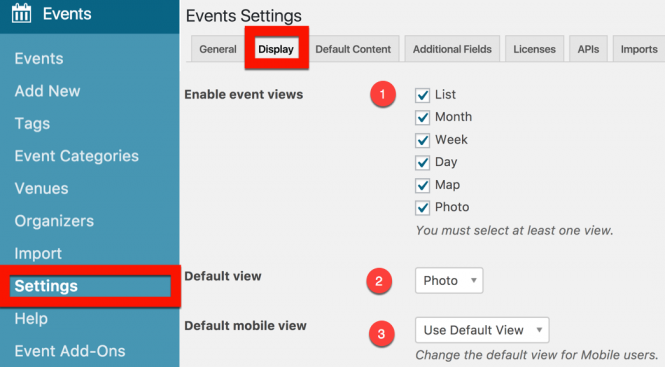
- Enable event views allows you can select which view types users can see from the front of the site.

- Default view will determine what users see initially upon visiting your events page.
- Default mobile view is available for Events Calendar Pro users and allows you to set a different default view for smaller screens.
Integrating with your theme
Depending upon your theme, you may want to switch your stylesheets and templates to achieve the desired look for you website. Head to Events → Settings → Display. Then select the best combination for just the right look.
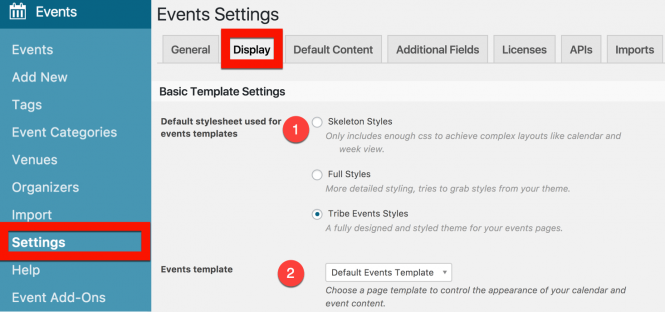
- Default stylesheet used for event templates
- Tribe Events Styles: Our most comprehensive level of styling, and the default option.
- Skeleton Styles: This is a very minimal level of styling, and is ideal for those who wish to roll their sleeves up and build their own custom set of rules.
- Event templates
- Default Events Template: A layout set by The Events Calendar
- Default Page Template: A layout set by your theme
How to Modify The Events Calendar colors, fonts, and styles
Do you want to modify The Events Calendar to better match your desired theme? Here are a few of our top tips to get just the right look:

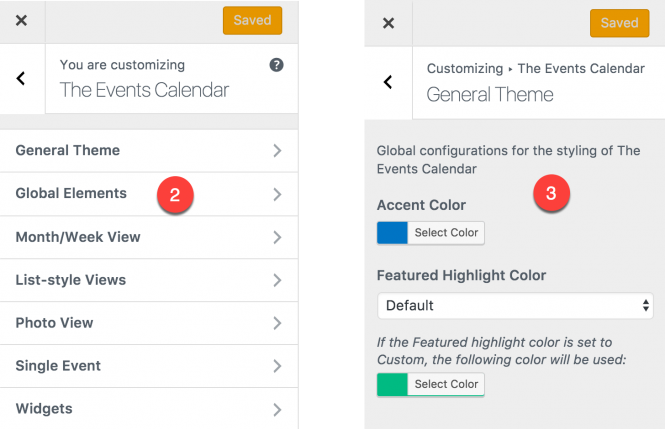
- Start by modifying what you can at Appearance → Customize→> The Events Calendar.
- Select Global Elements
- Modify the Accent Color
- Repeat for other theme elements
- Additional modifications are available in the Calendar Customizer extension.
We generally don’t recommend that you change the theme or plugin’s CSS files directly, as they will be overwritten. To avoid this, follow the steps outlined in our Themer’s Guide.
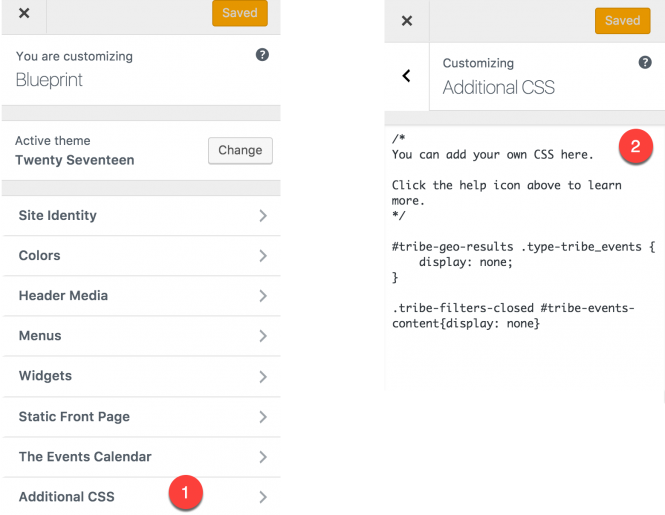
- Use overriding CSS files, or add CSS to your site using Appearance → Customize → Additional CSS.
- Add your custom CSS.
Please check out the following YouTube video and our Using Chrome Developer Tools tutorial for more information on making style changes using CSS.